Troubling Toilets Pt. 2
We finally got the toilet finished off the other day and super-smart it's looking too!!

All we really had to do was put it into the final position and bolt it down, replace the boxing in and then fit the service hatch (on the bedroom side of the wall). All the service hatch consists off was just a lockable plastic frame, where you can put an insert into it to match your wall etc.
These toilets are predominately designed for caravan use, so usually the service hatch would be on the outside of the caravan or RV (whatever they're called these days!) and is also lockable to protect theft of your cassette! Either way, it came with the toilet, so was perfect for us to fit into the wall to give it a clean, smart finish
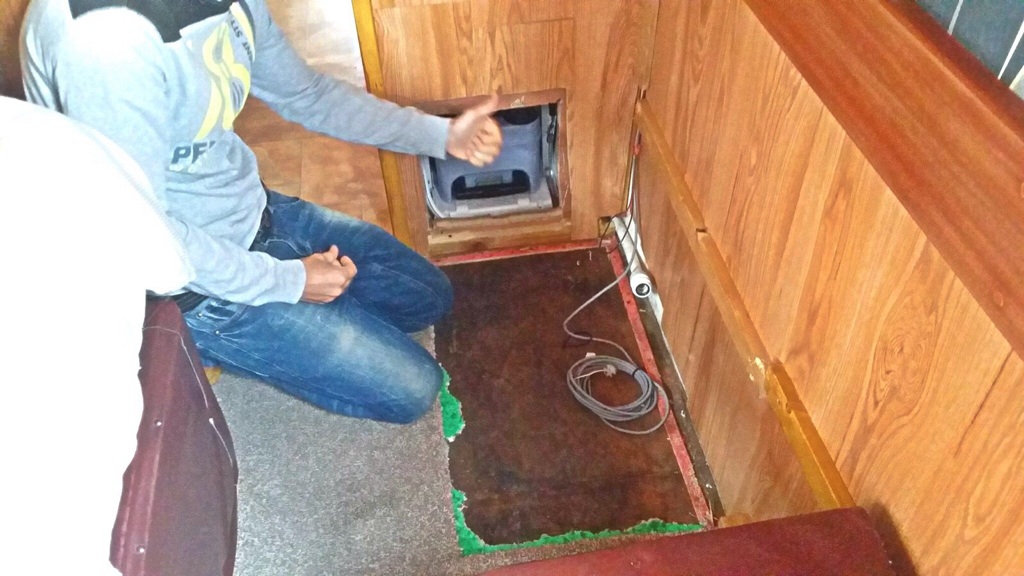
The access hatch to the cassette from the bedroom before the service hatch was fitted:
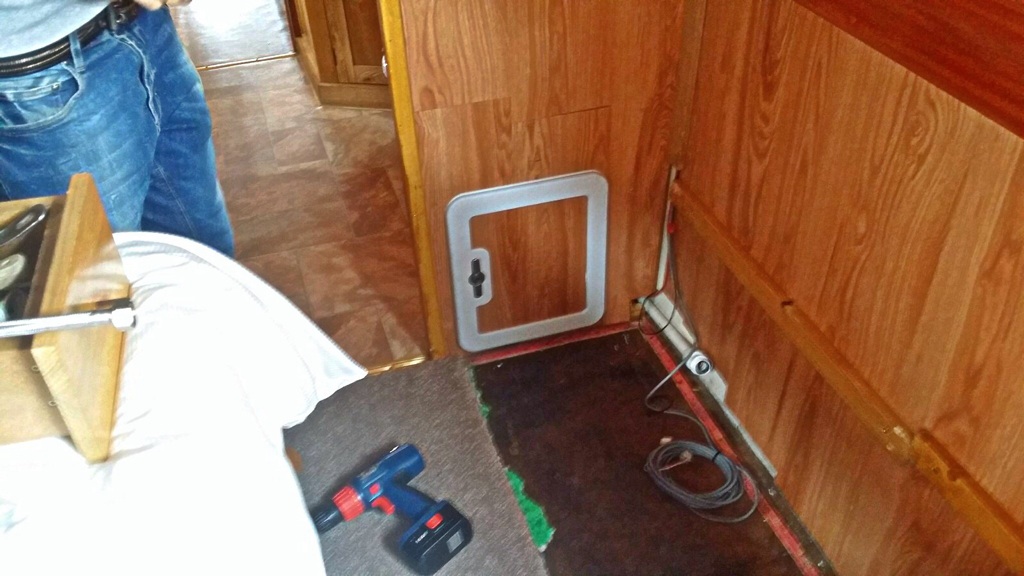
After fitting the service hatch:
As I was talking about in my last post, the old vacuum cassette was sat in the area where there is no carpet in the picture above! Originally there was carpet there and the cassette docking platform was sat on a piece of oak ply on top of that, but when the whole thing malfunctioned on me, the result meant removing the carpet due to half the contents of the cassette leaking onto the floor!
Obviously we will have to fit a whole new carpet in the bedroom now (more expense damn it!) and the batons on the walls will need removing as they aren't needed anymore in addition to more boxing in etc. to make it all look good and smart. I think we will probably now fit a small corner desk or something in that corner in time.
For now we will just have to put up with it all and wait until some more money grows on the trees I planted out on the deck a few months ago...
All we really had to do was put it into the final position and bolt it down, replace the boxing in and then fit the service hatch (on the bedroom side of the wall). All the service hatch consists off was just a lockable plastic frame, where you can put an insert into it to match your wall etc.
These toilets are predominately designed for caravan use, so usually the service hatch would be on the outside of the caravan or RV (whatever they're called these days!) and is also lockable to protect theft of your cassette! Either way, it came with the toilet, so was perfect for us to fit into the wall to give it a clean, smart finish
The access hatch to the cassette from the bedroom before the service hatch was fitted:
After fitting the service hatch:
As I was talking about in my last post, the old vacuum cassette was sat in the area where there is no carpet in the picture above! Originally there was carpet there and the cassette docking platform was sat on a piece of oak ply on top of that, but when the whole thing malfunctioned on me, the result meant removing the carpet due to half the contents of the cassette leaking onto the floor!
Obviously we will have to fit a whole new carpet in the bedroom now (more expense damn it!) and the batons on the walls will need removing as they aren't needed anymore in addition to more boxing in etc. to make it all look good and smart. I think we will probably now fit a small corner desk or something in that corner in time.
For now we will just have to put up with it all and wait until some more money grows on the trees I planted out on the deck a few months ago...


Comments
Post a Comment
TO POST A COMMENT, SIMPLY TYPE YOUR MESSAGE IN THE COMMENTS BOX BELOW (IT MIGHT BE ABOVE THIS MESSAGE DEPENDING ON HOW YOUR BROWSER DISPLAYS THINGS!)
THEN, SELECT "ANONYMOUS" FROM THE DROP DOWN MENU BELOW THAT AS THAT IS THE EASIEST WAY TO SAY HI TO ME!
DON'T FORGET TO LEAVE YOUR NAME ;)